Getting started with Colorful Budget Power-Up

It's great to have you on board for fun budgeting experience! This page serves as your step-by-step guide to start using Colorful Budget on your Trello boards with ease. We'll show you how to set up the budget board, explain the key features of the Power-Up, and guide you towards the next steps in case you want to learn some tips and tricks.
Setting up a budget board
Creating a new board
To begin, we need a board to store our budget details. You can either create a new board or use an existing one. For the sake of clarity, let's start fresh and create a new board.
Open your Trello and click on "Create" at the top. Then, select "Create board." Give it a name that reflects your budget, like "August 2023 Budget" or "Jim's Budget.". Make it visible only for yourself by choosing "Private" in the Visibility section, and pick some pleasing background. Once you're set, click "Create" to finish.

Enabling the Power-Up
Now that you're on freshly created board, you need to enable Colorful Budget Power-Up. You can do this easily by using this link or following these steps: Click on "Power-Ups" in the board header, then select "Add Power-Ups."
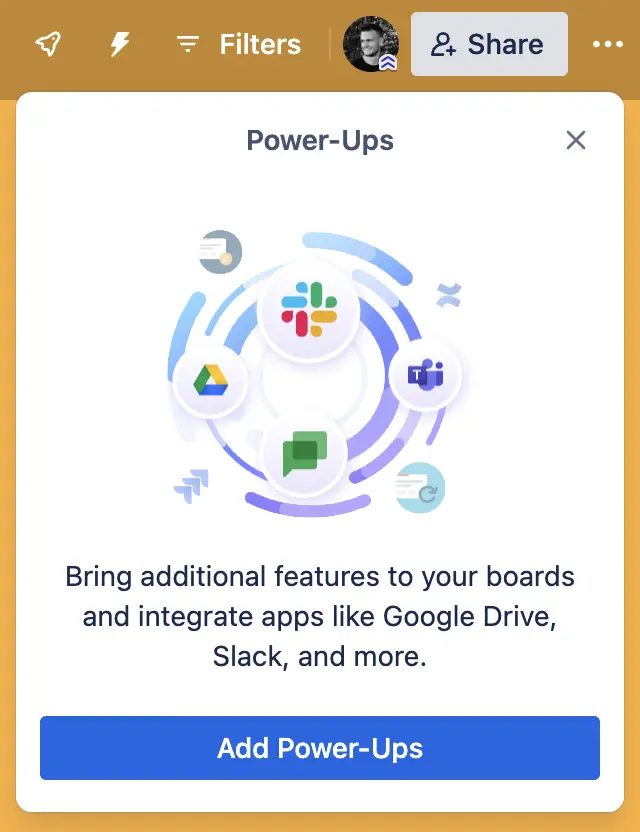
Search for "Colorful Budget," and once you see it, click "Add." Trello will show you brief description of permissions – read through it and click "Add." If authorization window will appear, click "Authorize" to continue.
Starting your subscription
Colorful Budget is a paid Power-Up, so you'll need to start a subscription before you can use it. Hit "Add category" board button. Once it opens a window telling you that you don't have a subscription yet, click "Subscribe" button.
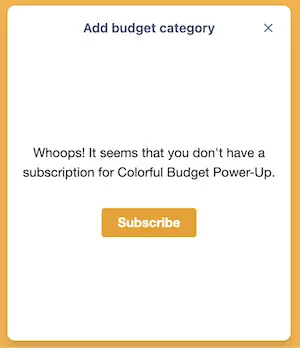
You will be taken to your Stripe customer portal where you can pay safely for the Colorful Budget subscription. Once you are done, you will be redirected back to your board.
Adding budget categories
Budget categories sits at the core of Colorful Budget. You can think of them as containers for your spendings – like "Food" for groceries and dining out, or "Entertainment" for books and streaming services. You can personalize your categories to match your style. Remember that you can also put incomes in categories, and even mix both incomes and expenses. This makes Colorful Budget a super flexible tool for any need.
Creating your first budget category
Let's start by making your first budget category. Click the "Add category" button at the top of the board.

Once the form opens, type a name for your category – to begin, something simple like "Food" works. Don't worry, you can rearrange categories anytime. Choose a color you like and click "Create."
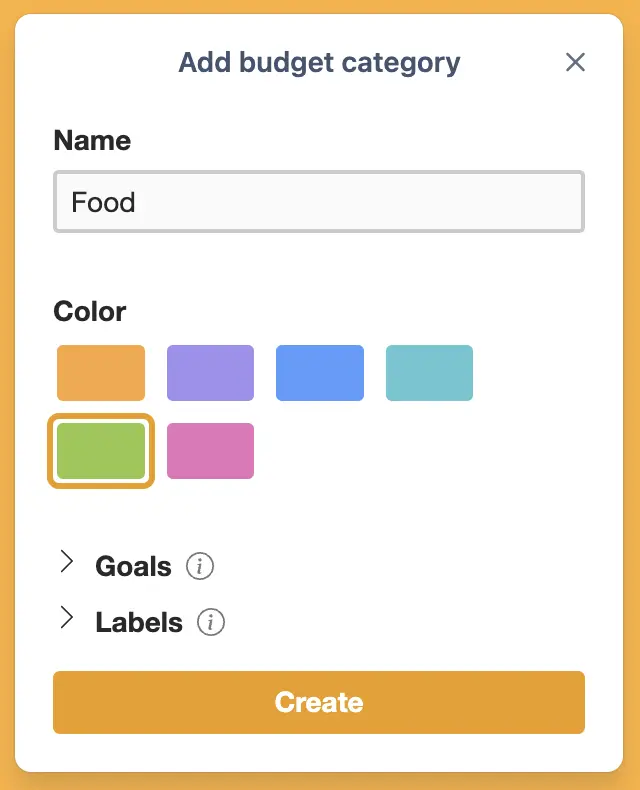
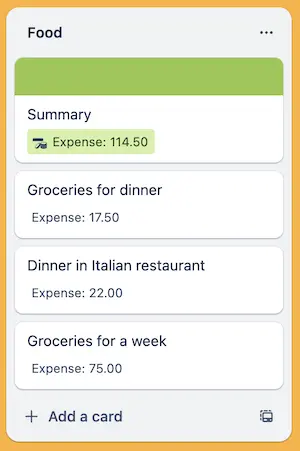
You'll see a new Trello list with your category name. Right now, it only has one card titled "Summary" with colored badges saying "Income" and "Expense." Both are at 0 since you haven't added any expenses (or incomes) yet.
Understanding summary cards
These colorful cards are known as summary cards. They provide quick, glanceable info about your categories – like adding up your spending, tracking your financial goals, and more. As your budget gets bigger, these cards become a valuable source of helpful info.
Growing your budget
Add a few more categories to your budget – about 3 to 5 should be good. And don't forget, you can always change a category by clicking the three dots next to the list name and selecting "Edit budget category...". You can keep growing your budget in your pace by adding new categories whenever you want.

Adding expenses and incomes
Now that your budget board is set up and you've created your budget categories, it's time to start adding expenses and incomes. In Colorful Budget, your expenses are represented by cards. This is really powerful as it allows you to fully leverage Trello's capabilities for expense management. For instance, you can utilize card templates for common expenses, set due dates for payment reminders, use labels and categories for organization, and more! For now, let's focus on how to add a basic expense. We'll delve into more advanced topics later on.
Adding your first expense
Start by choosing the budget category you want to add an expense to. For example, if you recently went grocery shopping, you would want the "Food" category. Find the list that corresponds to your chosen category and click "Add a card" button. Type a name for your expense, for example "Groceries for a week", and hit "Add card" button. Open your newly created cart and fill "Expense" field under the "Colorful Budget" section. That's it, you've created your first expense!
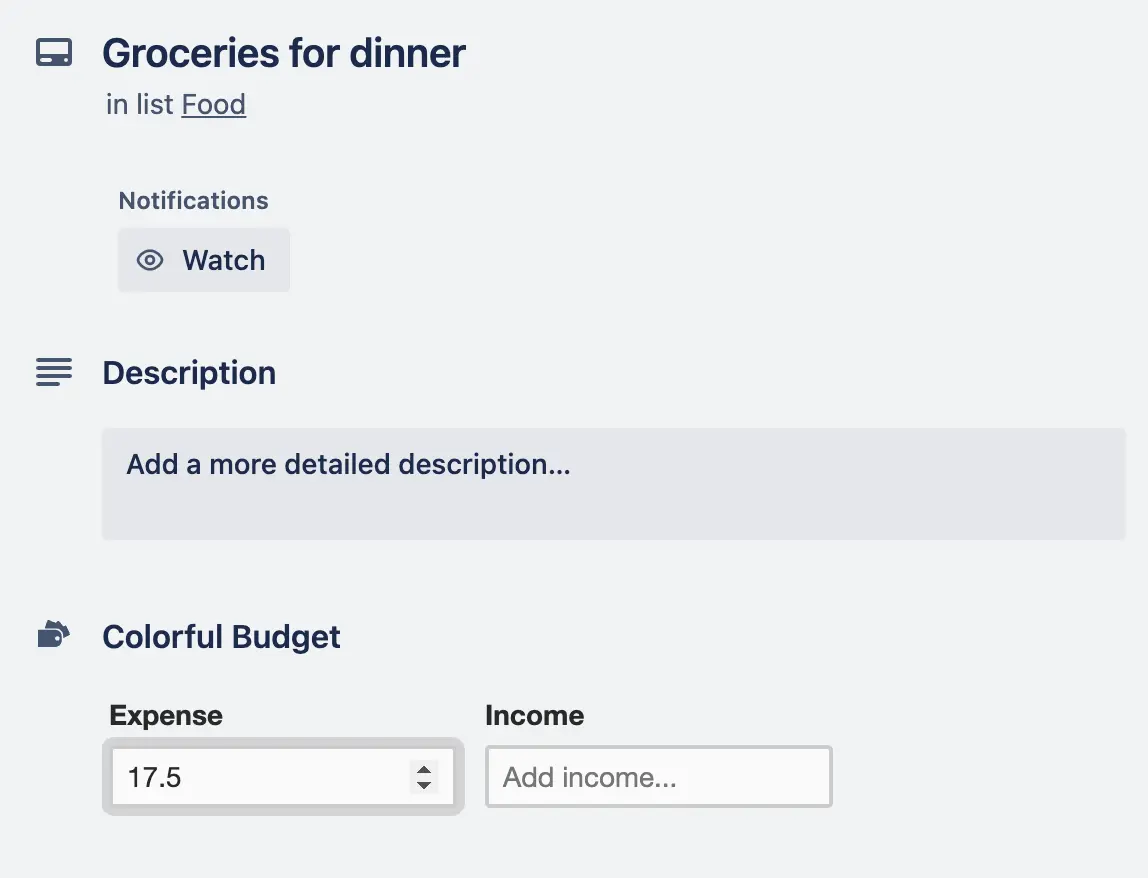
Close your expense card and notice that the Expense badge on your summary card is updated with the amount you just specified. If you have more of your recent expenses in mind, it's a good idea to add them now to fill your first budget board with some data.
Adding your first income
White it is perfectly fine to only add expenses to your budget board, adding your incomes as well unlocks powerful capabilities of our Power-Up. For example, you will be able to gain useful insights into your financial situation, like seeing how much you have to spend in current budget.
For our first budget, we want to have incomes neatly separated from the expenses - let's create new category named "Income". Now, repeat the steps from the section above (describing how to add an expense), with only exception being using "Income" field instead of "Expense". Note that you don't have to create separate category for your incomes. You can even have categories which have both incomes and expenses.
Stay colorful and organized
As you continue to add expenses and incomes, you'll see your budget board come to life with colors and meaningful data. Summary cards will neatly sum up your spendings divided into categories, giving you a clear overview of your financial situation in any time. As helpful as this is, it's just the beginning of what Colorful Budget has to offer! In the upcoming sections, we'll explore more exciting features - like visualising your budget and tracking financial goals - adding even more fun and functionality to your budgeting experience.
Visualizing your budget
Proper budget visualisation is like having a superhero sidekick for your finances. It makes budgeting easy to grasp, helps you spot spending patterns, and keeps you in control of your money.
Budget dashboard is a powerful feature of Colorful Budget dedicated just for this. It transforms your budget data into different types of informative, beautiful charts. To access it, just click "Budget dashboard" button on your board.

Let's explore some of the chart types that you have at your disposal.
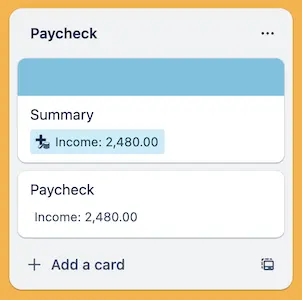
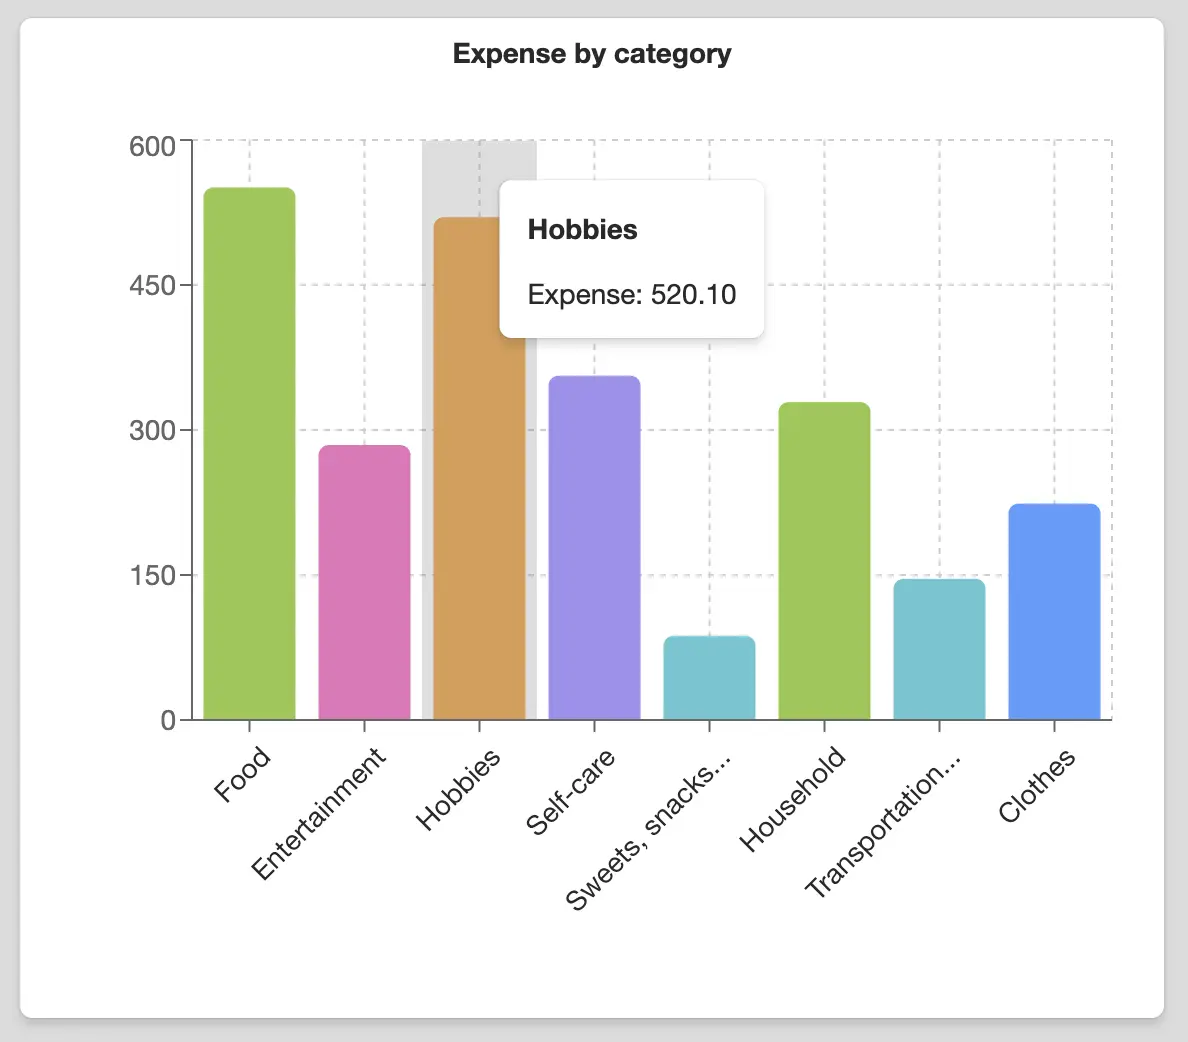
Viewing expense categories
This chart breaks down your spending into categories, which helps you see exactly where your money is going. It simplifies tracking and understanding your spending patterns, making it easier to budget effectively. If you've spread your income into categories as well, Colorful Budget will display another chart - income categories chart, so you can see where your money is coming from.
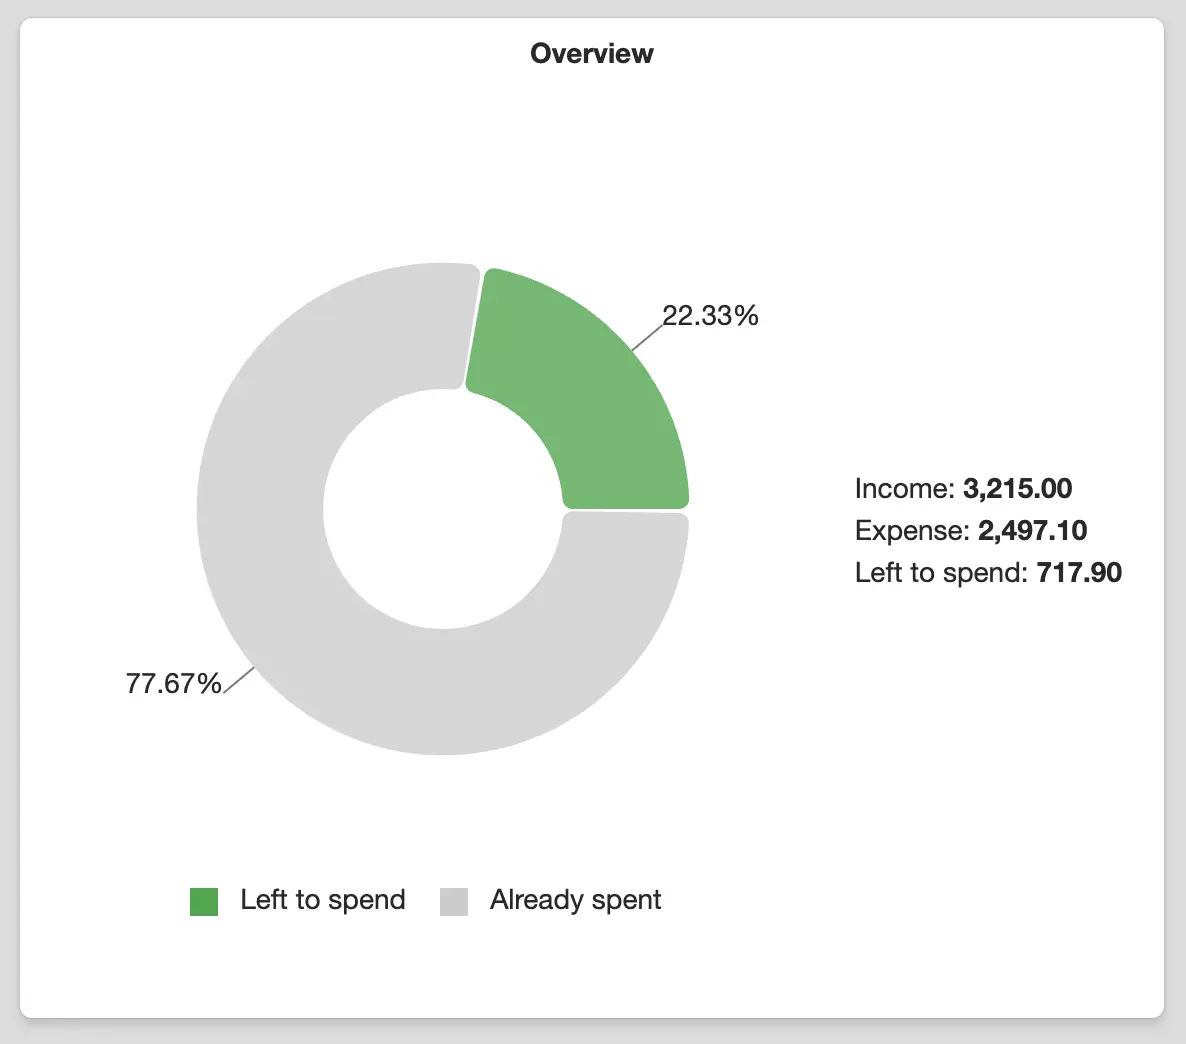
Viewing budget overview
If you want the big picture, the overview chart has your back. It shows your total income, total expenses, and the best part: how much money you have left to spend. Use it to keep your budget on the right path, as it gives you a clear snapshot of your financial health.
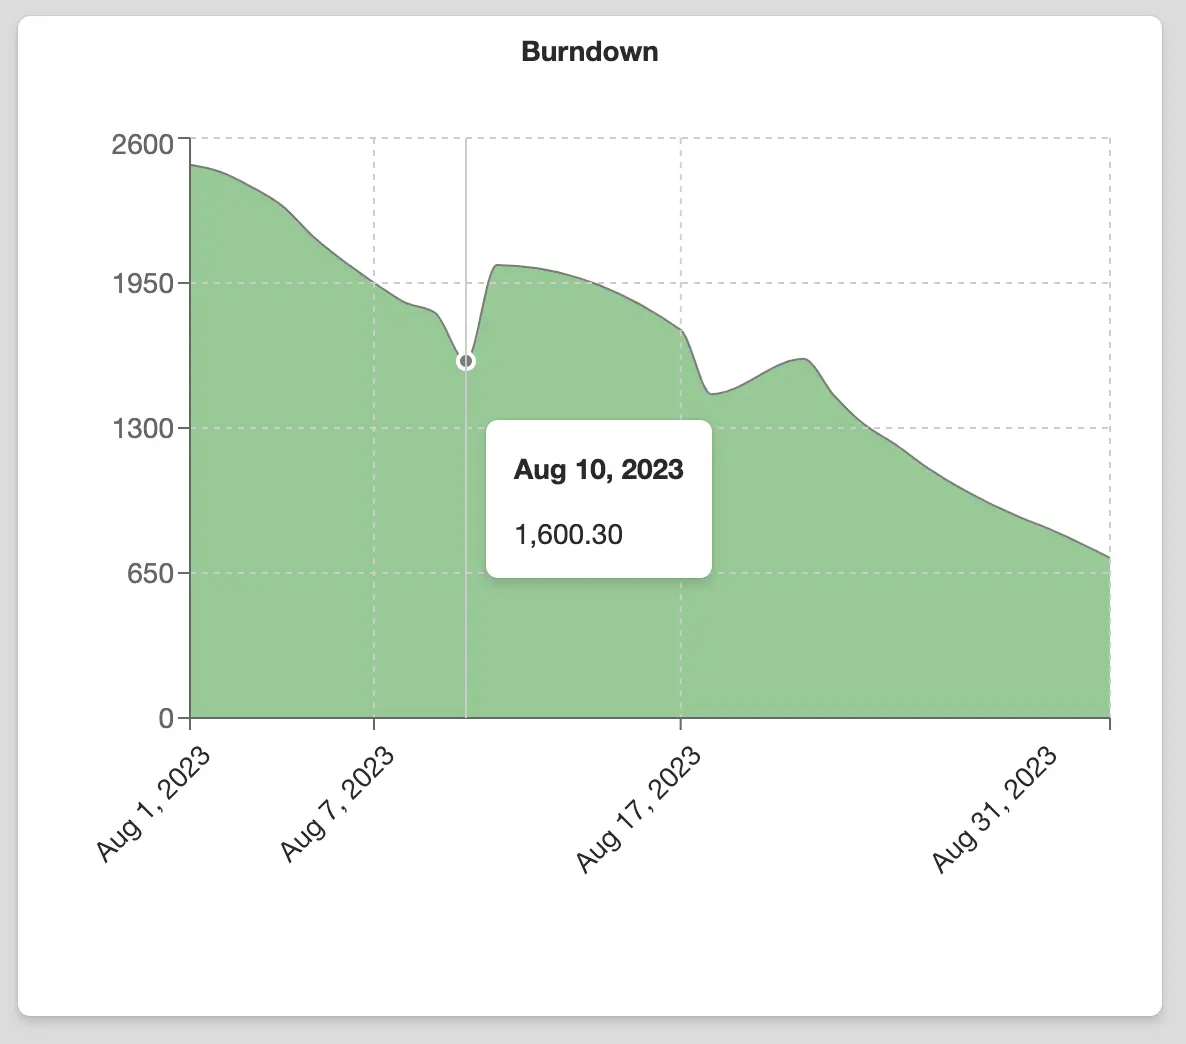
Viewing budget burndown chart
Burndown chart tracks your budget's progress over time, so you can tell if you're staying on track or if you're starting to spend too much. Just a heads up, this chart only shows up if you've got expenses that span multiple days, as it uses dates to work its magic.
Getting the most of your budget dashboard
Don't forget to play around with your charts a little bit, all of them display useful info when you hover your cursor over them. Also, here's a pro tip: the more data you put in – incomes, expenses, and categories – the more useful your budget dashboard becomes. It's like painting a more detailed picture of your finances. It can display even more charts if you'll use another feature Colorful Budget has to offer: setting up spending goals.
Setting up spending goals
Setting clear financial objectives provides you with a roadmap for your budget. It's like having your own financial compass! Colorful Budget makes it a breeze to set and track your goals.
Adding your first spending goal
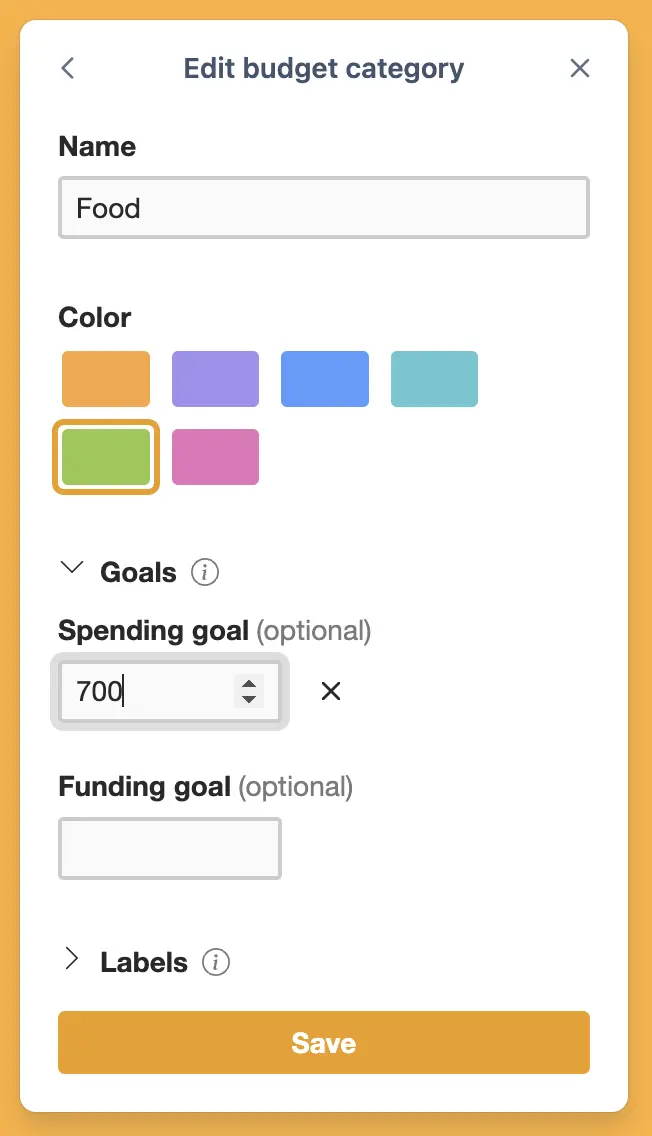
You can think about the spending goal as an amount you're committed not to exceed - your financial safety net. To set it up, find the category where you want to add your spending goal, and look for the three dots (⋮) button that open the list actions. Click on "Edit Budget Category" action, and you'll find the "Goals" section within the budget category editor. Here, simply enter the desired spending goal amount. Hit "Save" button to close the edit form.
Tracking your goals
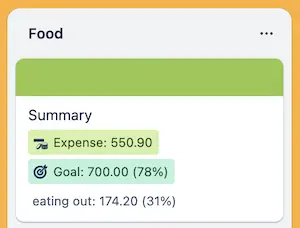
Now that you've set your spending goal, look on the category's summary card. You'll spot a new badge – the goal badge. This badge is there to help you keep track of your goal's progress. The lower the spending goal percentage, the better.
![]()
If the goal badge is showing below 80%, it'll be a reassuring green, indicating that you're doing well. Between 80% and 100%, it changes to a cautious yellow, reminding you to stay vigilant. Once it reaches 100% or higher, it turns a bold red, signaling that you need to be cautious with your spending. You can edit your goals at any time to adapt to your changing financial needs.
There is additional way to track your goals, especially if you're more of a visual person. Open the Budget Dashboard (click "Budget dashboard" button on your board) and find "Spendig goals" section. It will present your goals in nice clean chart. Hover over specific goal to see its fulfillment percentage.
![]()
Funding goals
Colorful Budget doesn't stop at spending goals. You can set funding goals as well, and the process is pretty much the same. You're not limited in any way – you can set as many funding and spending goals on your board as you need.
Now that we've learned how to grow our budget data by adding budget categories, expenses, and goals, let's take a look on how to export it outside your Trello board.
Exporting your budget
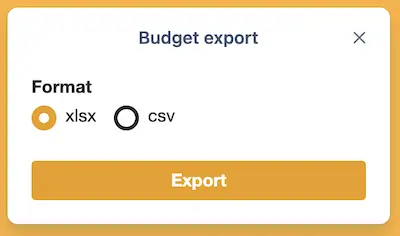
You can export all of your budget data in a just few clicks. Click the "Budget export" button on your board.

Once the window opens, click "Export". That's it! Excel file containing all your expenses and incomes, together with their categories and labels, is downloaded on your computer. If you wish so, you can change the export format before exporting.
Next steps
Congratulations! You've taken first steps towards mastering fun and effective budgeting with Colorful Budget and Trello. You've learned the basics of setting up your budget boards, creating categories, filling your budget with data, and using the budget dashboard to visualize your finances. This knowledge should empower you to perform most budgeting tasks in a briliant and efficient way, allowing you to take full control of your financial life.
If you want to learn even more, don't hesitate to dive into the Tips and Tricks page. It delves into advanced techniques, including budget templates, labeling, automation, mobile app usage, and more.